Modernizing an older CNC machine does not always require replacing its control. Many reliable mills and lathes still produce accurate parts when operators transfer programs carefully. The real challenge is compatibility. A 1980s or 1990s controller may depend on RS-232 communication, limited memory, paper-tape formats, or a specific baud-rate setting. One wrong parameter can turn a clean toolpath into a communication failure.
This 2026 guide explains how to load a g code program into an older cnc machine, from preparing the file to verifying the first cut. It focuses on practical shop conditions: a nine-pin serial cable, a blinking receive light, a nearly full control memory, and an operator checking offsets beside the machine. Experienced technicians commonly confirm units, work offsets, tool numbers, spindle commands, and program end codes before pressing Cycle Start. Dry runs, single-block operation, and feed-rate overrides remain valuable safeguards, especially when documentation is incomplete.
Industry research supports this careful approach. The National Institute of Standards and Technology highlights interoperability and reliable data exchange as foundations of modern manufacturing. Deloitte’s 2023 Smart Manufacturing and Operations Survey also shows that manufacturers continue investing in connected production while managing implementation risks. However, newer software cannot automatically solve older hardware limitations. That assumption causes trouble. The International Society of Automation further emphasizes disciplined procedures, cybersecurity, and system verification for industrial environments. This guide combines those principles with field-tested CNC practices, while acknowledging an uncomfortable truth: every legacy control behaves slightly differently. Always confirm the machine manual, test communication without cutting, and treat the first production run as a verification exercise.
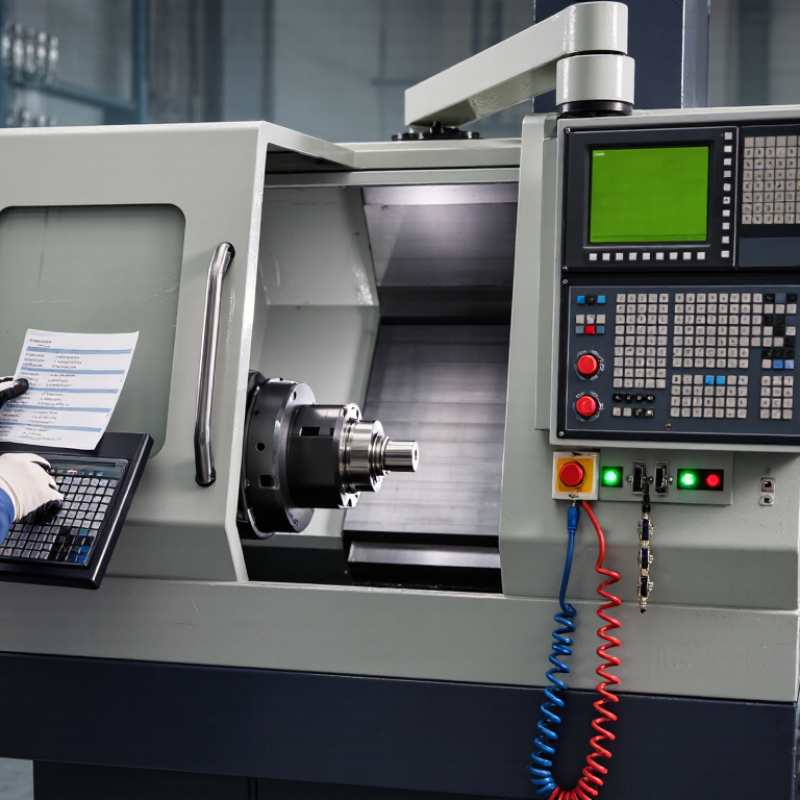
Before loading G-code, identify the control type, memory limit, and available transfer method. Older CNC machines may accept RS-232 serial input, floppy disks, memory cards, or drip-feeding through a dedicated computer. Do not assume a modern USB drive will work. It may not.
Read the control manual and inspect the cabinet label. Confirm baud rate, parity, data bits, stop bits, flow control, cable pinout, and program-ending characters. A single mismatch can produce alarms or corrupted blocks. Check whether the machine requires program numbers, checksums, fixed line endings, or a special tape mode. Compare the post-processor output with the machine’s G-code dialect. Run the file in graphics simulation first, then test it above the workpiece with low feed override. Keep the original file untouched.
Use the safest transfer method that matches the control. For a small program, serial transfer may be practical; for a large file, controlled drip-feeding can prevent memory overflow. NIST SP 800-82 Rev. 3 recommends asset inventories, network segmentation, and controlled removable media for operational technology. Apply those principles to every transfer laptop and cable. The Deloitte-Manufacturing Institute 2021 skills-gap study estimated 2.1 million U.S. manufacturing jobs could remain unfilled by 2030, making clear procedures increasingly valuable. The World Economic Forum’s Future of Jobs Report 2025 also projects that 39% of workers’ existing skills may change by 2030. Human checking still matters. My own caution: older controls often behave consistently—until a forgotten parameter proves otherwise.
Estimated transfer time for a 100 KiB G-code file using common serial communication settings found on older CNC controls.
Older CNC machines commonly use RS-232 serial transfer. The estimates assume asynchronous serial communication with 10 bits transmitted per byte. Actual times can be longer because of handshaking, line noise, controller processing, and drip-feeding requirements. Confirm the control type, communication port, baud rate, parity, data bits, and stop bits before transferring the program.
Preparing G-code for an older CNC machine begins with its controller manual, not the CAM export screen. Check supported commands, unit settings, line length, file extensions, and communication speed. Older systems may reject modern formatting or unfamiliar canned cycles. Keep each block simple. Use clear decimal values and avoid unnecessary comments.
I usually save a copy of the original program before making changes. Then, I remove unsupported commands and convert advanced cycles into basic linear movements when necessary. Confirm whether the machine expects millimeters or inches. A single wrong setting can ruin the toolpath. Use consistent line endings and plain text encoding. Some older controls also require numbered blocks or a specific program ending.
Test carefully. Load the file with the tool above the workpiece, then run it slowly in single-block mode. Watch the first positioning move, spindle command, and coolant instruction. A dry run is essential. I once trusted a clean simulation and missed an unsafe rapid move near a clamp. That mistake changed my checking routine. Review tool offsets, work coordinates, feed rates, and the final retract position. If an alarm appears, record the exact line and edit only one issue at a time. Avoid guessing. Test again.
2026 Top Guide: How to Load G Code Into Older CNC Machines?
Older CNC machines often accept G-code through a computer, memory card, or serial transfer device. Check the machine’s control manual before connecting anything. Confirm the file extension, character format, baud rate, parity, and stop settings. A wrong setting can create unreadable lines or stop transmission halfway. Keep the file short during your first test. Use a known program with simple movements, correct units, and conservative feed rates. I always inspect the first lines manually because automated exports can include unexpected commands.
Tips: Back up existing programs before transferring new code. For serial transfer, use a tested cable and match both device settings exactly. For a memory card, format it only as the control requires, then copy one verified file. When using a computer, keep the machine stopped until the full file appears correctly. Watch the control screen, not just the transfer software. Small details matter.
Run the program in single-block mode when possible. Keep the tool above the workpiece for the first movement. Confirm work offsets, tool numbers, spindle direction, and coolant commands. A dry run can reveal a bad coordinate before cutting begins. I have seen a perfectly valid file fail because one unit setting was wrong. That mistake is easy to miss. If the machine pauses, stop safely, record the alarm, and check the last transmitted line before trying again.
Before loading anything, inspect the older CNC machine’s control panel, memory capacity, and accepted file format. Confirm whether it reads RS-274 G-code, and check the required baud rate for serial transfer. A paper manual matters here.
Move the program through a verified computer or approved memory device. Remove old files only after recording their names and sizes. Select the correct work offset, tool numbers, units, and spindle limits. Then load the file into the machine’s memory. Watch the transfer counter. If using a serial connection, compare the machine’s settings with the computer’s settings exactly. One wrong character can stop communication. The 2023 Deloitte Smart Manufacturing and Operations Survey reported that 86% of manufacturing leaders viewed smart manufacturing as important for future competitiveness. Older controls still need careful human checks.
Open the uploaded program on the control. Scroll through the header and confirm the program number. Check the first tool call, work coordinate, feed rate, spindle direction, and coolant command. Run graphics simulation if available. Otherwise, perform a dry run with the tool above the workpiece. Use single-block mode and reduced rapid override. Keep your hand near the feed-hold control. I once trusted a correct-looking file with the wrong work offset; the machine moved safely, but the setup failed. That mistake was avoidable. After loading, compare the file checksum or line count when supported, then document the operator, date, file version, and machine settings.
Load the G-code into the CNC machine step by step using a safe workflow for older controllers, removable storage, serial transfer, or manual data entry.
| Step | Task | Action | What to Verify | Typical Risk | Priority |
|---|---|---|---|---|---|
| 1 | Identify the controller | Record the controller series, software revision, available input ports, memory capacity, and supported program format. | Confirm whether the machine accepts removable storage, serial transfer, punched tape input, or only manual keyboard entry. | Using a transfer method or file format that the controller cannot read. | Required |
| 2 | Back up existing programs | Save important programs, tool offsets, work offsets, parameters, and machine settings before loading new code. | Open at least one backup file or verify that the transferred data is readable on a separate device. | Loss of production programs or offset data during editing or transfer. | Required |
| 3 | Prepare the G-code file | Use plain text G-code with one block per line. Remove unsupported comments, special characters, duplicate program numbers, and unnecessary blank lines. | Check units, coordinate system commands, tool-change commands, spindle commands, feed rates, and program end codes. | Syntax errors, incorrect units, or commands unsupported by the older control. | Required |
| 4 | Check file naming | Use a short filename and a unique program number that matches the controller’s naming rules. | Confirm the controller’s maximum filename length, permitted characters, and required program-number format. | The file may not appear in the directory or may overwrite another program. | Required |
| 5 | Select the transfer method | Choose the available method: removable storage, serial cable, drip-feed transmission, tape reader, or manual entry. | Match the method to the controller’s hardware and confirm that the required cable, adapter, reader, or communication software is available. | Interrupted transfer, incompatible connectors, or communication failure. | Required |
| 6 | Format the storage device | If removable storage is supported, format it using the file system and capacity accepted by the older controller. Copy only the required program files. | Verify that the machine can display the storage device and read its directory before starting the transfer. | Newer storage formats or excessive capacity may not be recognized. | Use Care |
| 7 | Configure serial communication | For serial transfer, set matching communication parameters on both devices, including baud rate, data bits, parity, stop bits, and flow control. | Use a short, secure cable and confirm that the input and output settings are not reversed. | Garbled characters, missing blocks, or a transfer that stops unexpectedly. | Use Care |
| 8 | Open the machine program directory | Switch the control to the program, edit, input/output, or memory-management screen, depending on the controller layout. | Ensure the machine is not running another program and that editing or input mode is enabled. | Loading into the wrong memory location or modifying an active program. | Required |
| 9 | Load or transfer the program | Start the receive, input, read, or upload command on the machine. Then start the send or transmit command on the external device. | Watch the program number, block count, transfer indicator, and completion message. | Stopping the transfer too early can create an incomplete or unusable program. | Required |
| 10 | Review the loaded code | Scroll through the beginning, middle, and end of the program. Confirm that the first and final blocks are complete. | Check tool numbers, work offsets, spindle direction, feed rates, safe retracts, and program-end commands. | Hidden truncation or altered characters may cause unexpected motion. | Required |
| 11 | Run a safety simulation | Use graphics, dry run, single-block mode, feed override, and spindle override where available. Keep the tool above the workpiece for the first motion test. | Confirm travel direction, clearance, tool path, work zero, tool offsets, and maximum machine travel. | Collision, overtravel, incorrect origin, or wrong tool compensation. | Required |
| 12 | Run the first part cautiously | Secure the workpiece, install the correct tool, remain at the emergency stop, and monitor the first cycle continuously. | Verify chip load, cutting direction, coolant use, dimensions, surface finish, and abnormal noise or vibration. | Material movement, tool breakage, dimensional errors, or machine damage. | Required |
| 13 | Save the verified program | Store the approved version with a clear revision number and record any changes made at the machine. | Maintain a separate copy of the proven program and document tools, offsets, material, and inspection results. | Repeating an unverified version or losing production history. | Recommended |
Loading G-code into an older CNC machine demands more than transferring a file. The control may interpret commands differently, especially with units, arcs, canned cycles, or program endings. I always compare the code with the machine manual before sending it. I also save the original program and create a readable backup copy.
Check every tool number, offset, spindle speed, feed rate, and coolant command. Confirm the coordinate system matches the setup. A single incorrect work offset can move the cutter far from the intended path. Watch for unsupported commands. Remove them only after understanding their purpose. My first review is never perfect, so I read the file again after a short break.
Test the program with the workpiece removed when possible. Keep the tool above the fixture and use a reduced rapid override. Dry-run each section, then repeat it in single-block mode. Stay beside the emergency stop. Do not walk away. Listen for unusual sounds and watch axis movement closely. A simulated toolpath can reveal geometry problems, but it cannot confirm every machine behavior.
Before cutting material, verify tool length measurements and fixture clearance manually. Run the first pass with conservative feed and spindle settings. Keep one hand near the controls, but avoid changing values without a reason. If the machine pauses unexpectedly, stop and investigate the exact program line. Never assume an old control will respond like a modern one. Safety depends on checking, not confidence.
Begin with the controller manual, not the CAM export screen. Verify supported commands, units, file extensions, line length, and communication speed. Keep every block simple.
Remove unfamiliar commands when necessary. Convert advanced cycles into basic linear movements. This may create longer files, but compatibility usually matters more.
Confirm whether the machine uses millimeters or inches. Check the work offset before running. One incorrect setting can ruin an otherwise correct toolpath.
Use plain text encoding and consistent line endings. Some older controls require numbered blocks or a specific program ending. Check the manual carefully.
Place the tool above the workpiece during loading. Use graphics simulation when available. Then run single-block mode with reduced rapid override. Watch the first positioning move.
Check the first tool call, spindle direction, feed rate, coolant command, and final retract. Keep your hand near feed hold. Stay focused.
Match the machine and computer settings exactly, including baud rate. Watch the transfer counter. One wrong character can stop communication.
Record the exact line and message. Change only one issue at a time, then test again. Avoid guessing. My previous checking was not perfect. A safe-looking simulation once missed a rapid move near a clamp.
Loading G-code into an older CNC machine requires a careful process because legacy controls may use different file formats, storage media, and communication settings. This guide explains how to load a g code program into an older cnc machine by first identifying the controller type and selecting a compatible transfer method, such as a memory card, serial connection, or external transfer device. The G-code should be reviewed and formatted to match the machine’s requirements, including file structure, character limits, units, coordinate settings, and program naming rules.
After preparing the file, connect the selected device and transfer the program step by step, confirming that the machine receives the complete file without communication errors. Before machining, inspect the imported code, verify tool paths, offsets, work coordinates, spindle commands, and feed rates. Perform a safe test, such as a dry run or single-block operation, while keeping clear access to the stop controls. Only begin full operation after the program behaves as expected and all machine settings have been confirmed.

AcuTek CNC