Top 10 Tips on How to Read a CNC Setup Sheet Correctly?

Time:2026-09-11 Author:Sienna
0%

A CNC setup sheet is more than paperwork beside the machine. It connects the drawing, tooling, workholding, offsets, program, and inspection plan. Learning how to read a cnc setup sheet correctly helps operators reduce hesitation before the first cycle. It also exposes missing information before metal is cut.

Deloitte’s 2023 Smart Manufacturing Survey reported that 86% of manufacturing leaders expect smart manufacturing to become a major competitiveness driver within five years. That expectation depends on repeatable shop-floor decisions. A setup sheet supports that repeatability when every value is checked against the machine, material, and revision level. Mike Lynch, a CNC educator and founder of CNC Concepts, describes the setup sheet as “the roadmap for making a part.” The phrase is simple. The responsibility is not.

Look closely.

A spindle speed may appear correct but conflict with the tool manufacturer’s recommendation. An offset number may be clear but belong to an earlier revision. A workholding sketch may look obvious until a clamp blocks tool access. These small gaps create real delays, scrapped parts, and unsafe assumptions. The National Institute of Standards and Technology has repeatedly highlighted the value of standardized data and process control in advanced manufacturing. Still, standardization does not replace judgment.

This guide explains the practical details behind each field. It covers symbols, tool lists, datum references, offsets, probing notes, and inspection requirements. Some sheets will be incomplete. That is the point. Reading correctly means questioning the document, not merely following it.
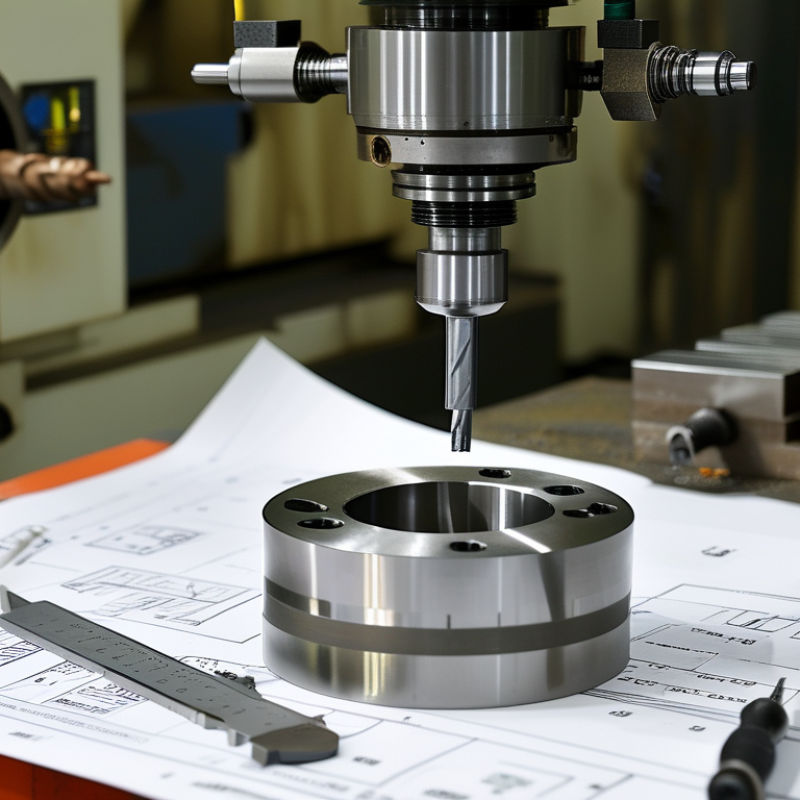
Top 10 Tips on How to Read a CNC Setup Sheet Correctly?

Identify Part Number, Revision, Material, and Quantity Before Setup

Before touching the machine, read the setup sheet like a controlled production record. Find the part number and match it with the traveler, drawing, and program file. One missing digit can send the wrong geometry to the correct-looking fixture. Check the revision letter. Then verify material grade, stock size, and quantity. Do not treat a handwritten change as approval. Ask the responsible engineer or supervisor to confirm it. National Institute of Standards and Technology guidance stresses linking manufacturing records to specific parts and revisions. A 2024 manufacturing skills-gap report estimates that 3.8 million manufacturing roles may be needed by 2033, with 1.9 million potentially unfilled. Fewer experienced eyes increase the value of disciplined checks.

Write the quantity beside the job number, not only in your memory. Compare the required quantity with raw stock, blanks, and inspection samples. If the sheet says 24 pieces, confirm whether 24 good parts or 24 loaded cycles are intended. Clarify scrap allowance. Record the material heat or lot when traceability requires it. The American Society for Quality cites quality-cost estimates near 15% to 20% of sales in many organizations. That figure is broad, not a promise. I have seen careful operators miss revision dates when production feels urgent. Pause when anything conflicts. Document the question before setup.

Map Datums, Work Offsets, and GD&T to ASME Y14.5 Requirements

Top 10 Tips on How to Read a CNC Setup Sheet Correctly?

Map Datums, Work Offsets, and GD&T to ASME Y14.5 Requirements

A CNC setup sheet is more than a list of coordinates. It connects design intent with controlled motion, inspection, and repeatable production. Start by identifying the primary, secondary, and tertiary datum features. These datums establish the ASME Y14.5 datum reference frame. Confirm their physical locations on the drawing, not only on the setup sheet.

Then compare the datum structure with the work offset values. A work offset tells the machine where the part origin sits within its coordinate system. It does not replace the drawing’s datum scheme. Check how the operator located each datum using a probe, indicator, fixture, or approved edge reference. A small alignment error can shift every feature. That detail is easy to miss.

Read each feature control frame beside its related dimensions. Position, profile, flatness, and perpendicularity controls may depend on specific datum modifiers. Verify whether the tolerance applies at Regardless of Feature Size or another stated condition. Measure from the same datum features used during setup. This keeps machining and inspection aligned with the applicable ASME Y14.5 edition.

I have seen offsets copied correctly but interpreted incorrectly. The numbers looked clean. The part still failed inspection. A better habit is sketching the datum reference frame beside the machine axes. Leave room for questions. Even experienced programmers should challenge unclear origin notes, because a setup sheet can contain outdated assumptions.

Verify Tool Lists, Holders, and Offsets Against the Setup Sheet

A CNC setup sheet is a practical control document, not a rough suggestion. Before loading tools, compare every tool number with the listed cutter, diameter, and operation. Match T01, T02, and other numbers with the machine table. Then verify each holder type and gauge length. A small mismatch can change cutting depth or cause an unexpected collision. Do not trust memory.

Check tool length offsets and diameter offsets against the sheet. The tool’s gauge length should match the recorded value, especially after changing holders. Measure it with suitable equipment, then compare the result with the stated offset. If the difference is significant, stop and investigate instead of forcing a correction. I once accepted a familiar-looking holder without checking its projection. The cutter reached the workpiece earlier than expected. That mistake was preventable.

Review the work offset, datum location, and sign direction before pressing cycle start. Confirm that the programmed origin matches the physical setup on the table. Use a height gauge, probe, or approved measurement method when available. Ask another qualified operator to review unusual values. Fresh eyes help. Record approved adjustments directly on the setup sheet, including the reason and measurement used. A handwritten change without a clear reference can create confusion during the next shift.

Check Cutting Data with RPM = 12V/(πD) and Feed = fz×z×RPM

A CNC setup sheet is a calculation document, not just a machine checklist. Check the units before reading any cutting value. For inch-based work, use RPM = 12V/(πD), where V is surface speed in SFM and D is cutter diameter in inches. For example, 400 SFM with a 0.5-inch cutter gives about 3,056 RPM. Then calculate feed with Feed = fz×z×RPM. At 0.002-inch chip load and four flutes, feed equals about 24.4 IPM. Metric sheets need a different conversion factor, so do not copy the formula blindly.

Tip: Circle V, D, fz, and z on the sheet. I still recheck them.

The U.S. Cutting Tool Institute and AMT reported approximately 2.61 billion dollars in U.S. cutting-tool consumption during 2023. That figure reflects a large industrial market, but it does not guarantee a correct setup. Tool diameter may differ after regrinding. Actual flute count may also be lower for variable-pitch tools. Confirm the tool physically, then compare the sheet with the controller limits, holder rating, coolant condition, and material specification. A spindle limit can reduce the calculated RPM. A weak workholding setup can require a lower feed.

Tip: Run the first pass conservatively. Listen for sharp chatter, watch chip color, and inspect the edge after cutting. The setup sheet may be outdated. That is worth admitting. Record the actual RPM, feed, tool wear, and measured part result for the next revision.

Prove the First Piece with ISO 2768 Tolerances and Cpk ≥ 1.33

Tip 1: Read the setup sheet beside the current drawing, not from memory. Confirm the revision, material, datum structure, tool numbers, and inspection points. ISO 2768 applies only where general tolerances are specified. It does not replace a tighter dimension on the drawing.

Tip 2: Prove the first piece with calibrated equipment. Record actual values, not simple pass-or-fail marks. Check critical diameters, hole locations, surface requirements, and visual defects such as burrs. A clean first piece can still hide a setup problem. I have seen temperature changes shift measurements after machining. Let the part stabilize when accuracy matters.

Tip 3: Treat Cpk ≥ 1.33 as evidence of process capability, not proof from one part. Collect repeated measurements under stable conditions, then calculate Cpk using the specification limits and process variation. Confirm that the average is centered, not merely inside the tolerance band. The first piece establishes the setup; later pieces test consistency. Small sample results can mislead. Review tool wear, offsets, coolant flow, and operator adjustments before approval. A rushed sign-off may look efficient, but it weakens traceability and invites rework.

Top 10 Tips on How to Read a CNC Setup Sheet Correctly? – Prove the First Piece with ISO 2768 Tolerances and Cpk ≥ 1.33
Practical setup-sheet review checklist for first-piece approval, general tolerances, measurement control, and process capability verification.
No. Setup-Sheet Dimension What to Read or Verify Illustrative Data Acceptance Rule First-Piece Status
1 Part identification and revision Confirm part number, drawing revision, operation number, material, and quantity before loading the program. Revision: C
Material: stainless steel, solution-annealed condition
Operation: CNC milling, Op. 20
The setup sheet, drawing, tool list, and CNC program must show the same revision and operation. Matched
2 Workholding and datum scheme Identify the primary, secondary, and tertiary datums, locating surfaces, clamping direction, and work offset origin. Primary datum A: bottom face
Secondary datum B: machined side face
Tertiary datum C: end face
Work offset: G54 at datum intersection
All inspection dimensions must be traceable to the drawing datums; clamping must not distort the part. Confirmed
3 Material and stock allowance Check raw-stock size, material grade, condition, and allowance for each machined surface. Raw stock: 52.0 mm × 32.0 mm × 82.0 mm
Finished envelope: 50.0 mm × 30.0 mm × 80.0 mm
Nominal allowance: 1.0 mm per side
Stock must provide sufficient material for cleanup without exceeding fixture, tool, or machine limits. Suitable
4 Tool list and cutting data Read tool number, cutter diameter, gauge length, spindle speed, feed rate, depth of cut, and coolant requirement. T01: 10 mm carbide end mill
Spindle speed: 4,500 rpm
Feed rate: 540 mm/min
Axial depth of cut: 2.0 mm
Tool offsets and cutting data must match the setup sheet; verify that the tool is suitable for the material and reach. Verified
5 Critical dimensions and datums Highlight dimensions that control fit, function, location, or downstream assembly. Measure these before non-critical features. Critical hole location: X 25.00 ± 0.05 mm
Bore diameter: Ø20.00 ± 0.03 mm
Overall length: 80.00 ± 0.20 mm
Every critical feature must be measured with a calibrated instrument and reported against its specific tolerance. Prioritized
6 ISO 2768 general tolerances Read the tolerance class in the drawing title block. If ISO 2768-1 class m is specified, apply it only where an individual tolerance is not given. For ISO 2768-1 class m, a 50 mm linear dimension has a general tolerance of ±0.3 mm.
A 20 mm dimension has a general tolerance of ±0.2 mm.
Specific tolerances override general tolerances. Do not apply ISO 2768 to dimensions with their own limit or tolerance. Applied Correctly
7 Inspection method and resolution Match each feature with an appropriate measuring method, instrument range, resolution, and calibration status. 50.00 mm size: calibrated micrometer, 0.001 mm resolution
Hole location: calibrated CMM, 0.001 mm reporting resolution
Surface finish: portable profilometer, Ra measurement
Measurement uncertainty should be sufficiently smaller than the tolerance; instruments must be within calibration. Ready
8 First-piece measurement record Record actual results, not only pass/fail marks. Include instrument identification, operator, date, and temperature where relevant. Feature: 50.00 ± 0.10 mm
First-piece result: 50.018 mm
Instrument resolution: 0.001 mm
Inspection temperature: 20 °C
50.018 mm is within the specification limits of 49.900–50.100 mm. Pass
9 Offset adjustment and recheck Use measured error to make a controlled wear-offset correction. Do not change geometry offsets without authorization and documentation. Measured size: 50.018 mm
Target: 50.000 mm
Observed error: +0.018 mm
Corrective action: apply a documented 0.018 mm tool-wear adjustment, then remeasure.
After any correction, repeat the measurement and confirm that the feature remains within tolerance and process limits. Rechecked
10 Cpk and production release Use a representative short-run sample to assess process capability; a single first piece can prove conformity but cannot establish Cpk. Specification: 50.00 ± 0.10 mm
Sample size: 30 pieces
Mean: 50.018 mm
Estimated within-process σ: 0.019 mm
Cp = 1.75; Cpu = 1.44; Cpl = 2.07; Cpk = 1.44
Release when all first-piece requirements pass and Cpk ≥ 1.33, unless the approved quality plan specifies a different criterion. Approved
Technical note: ISO 2768 general tolerances apply only when the drawing explicitly references the applicable ISO 2768 tolerance class and no individual tolerance is provided. Cpk should be calculated from a stable, representative sample; the first-piece inspection confirms the initial setup, while the capability study verifies repeatable production performance.

FAQS

: What should I verify before touching the machine?

: Confirm the part number, revision, material grade, stock size, and required quantity. Match the traveler, drawing, and program file. One digit matters. Resolve handwritten changes with an authorized person before setup.

How should I confirm the production quantity?

Write the quantity beside the job number. Check raw stock, blanks, and inspection samples. Ask whether 24 pieces means 24 good parts or 24 loaded cycles. Record scrap allowance and material lot details when traceability requires them.

Why are revision checks important?

A current-looking setup can contain outdated geometry or origin notes. Compare every revision letter across the drawing, traveler, program, and setup sheet. Do not trust memory. Pause when documents disagree.

How do datums affect CNC setup?

Identify the primary, secondary, and tertiary datum features on the drawing. Locate them physically on the part. Then compare them with the work offset and probing method. An offset is not a replacement for the datum scheme.

How can I connect GD&T requirements with inspection?

Read each feature control frame beside its related dimension. Check the stated datum references and tolerance conditions. Measure from the same datum features used during setup. A clean measurement can still use the wrong origin.

How do I calculate spindle speed and feed?

For inch units, use RPM = 12V ÷ (πD). Use Feed = fz × z × RPM. For 400 SFM and a 0.5-inch cutter, speed is about 3,056 RPM. At 0.002-inch chip load and four flutes, feed is about 24.4 IPM.

What should I check before using calculated cutting data?

Confirm the actual cutter diameter, flute count, units, and tool condition. A reground tool may not match the listed diameter. Check spindle limits, holder ratings, coolant, material, and workholding strength. The formula is not enough.

How should I handle the first cutting pass?

Run conservatively and watch the chips, tool edge, and sound. Sharp chatter deserves attention. Inspect the first part carefully. Record actual speed, feed, tool wear, and measured results for future updates.

Conclusion

Learning how to read a cnc setup sheet correctly is essential for producing safe, accurate, and repeatable parts. Before starting the machine, confirm the part number, revision level, material, and required quantity so the setup matches the current production requirement. Review the datum structure, work offsets, and GD&T callouts, and relate them to ASME Y14.5 requirements to understand how the part must be located and inspected. The setup sheet should also be checked against the actual tool list, holders, tool numbers, and recorded offsets.

Next, verify the cutting conditions before machining. Calculate spindle speed with RPM = 12V/(πD), and determine feed rate using Feed = fz × z × RPM. After setup, prove the first piece carefully and inspect all critical dimensions according to the specified ISO 2768 tolerances. Confirm that the process is stable and capable, with a target Cpk of at least 1.33 where required. This disciplined review helps prevent setup errors, reduce scrap, and maintain consistent quality.

Sienna

Sienna

Sienna is a skilled marketing professional with a deep expertise in our company’s core products and services. With a passion for innovation and detail, she plays a pivotal role in crafting insightful blog posts that not only highlight the unique features of our offerings but also provide valuable......